Recharging the car’s air conditioning will allow us to make our vehicle’s air conditioning work correctly again, since when something is worn out, it must be recharged.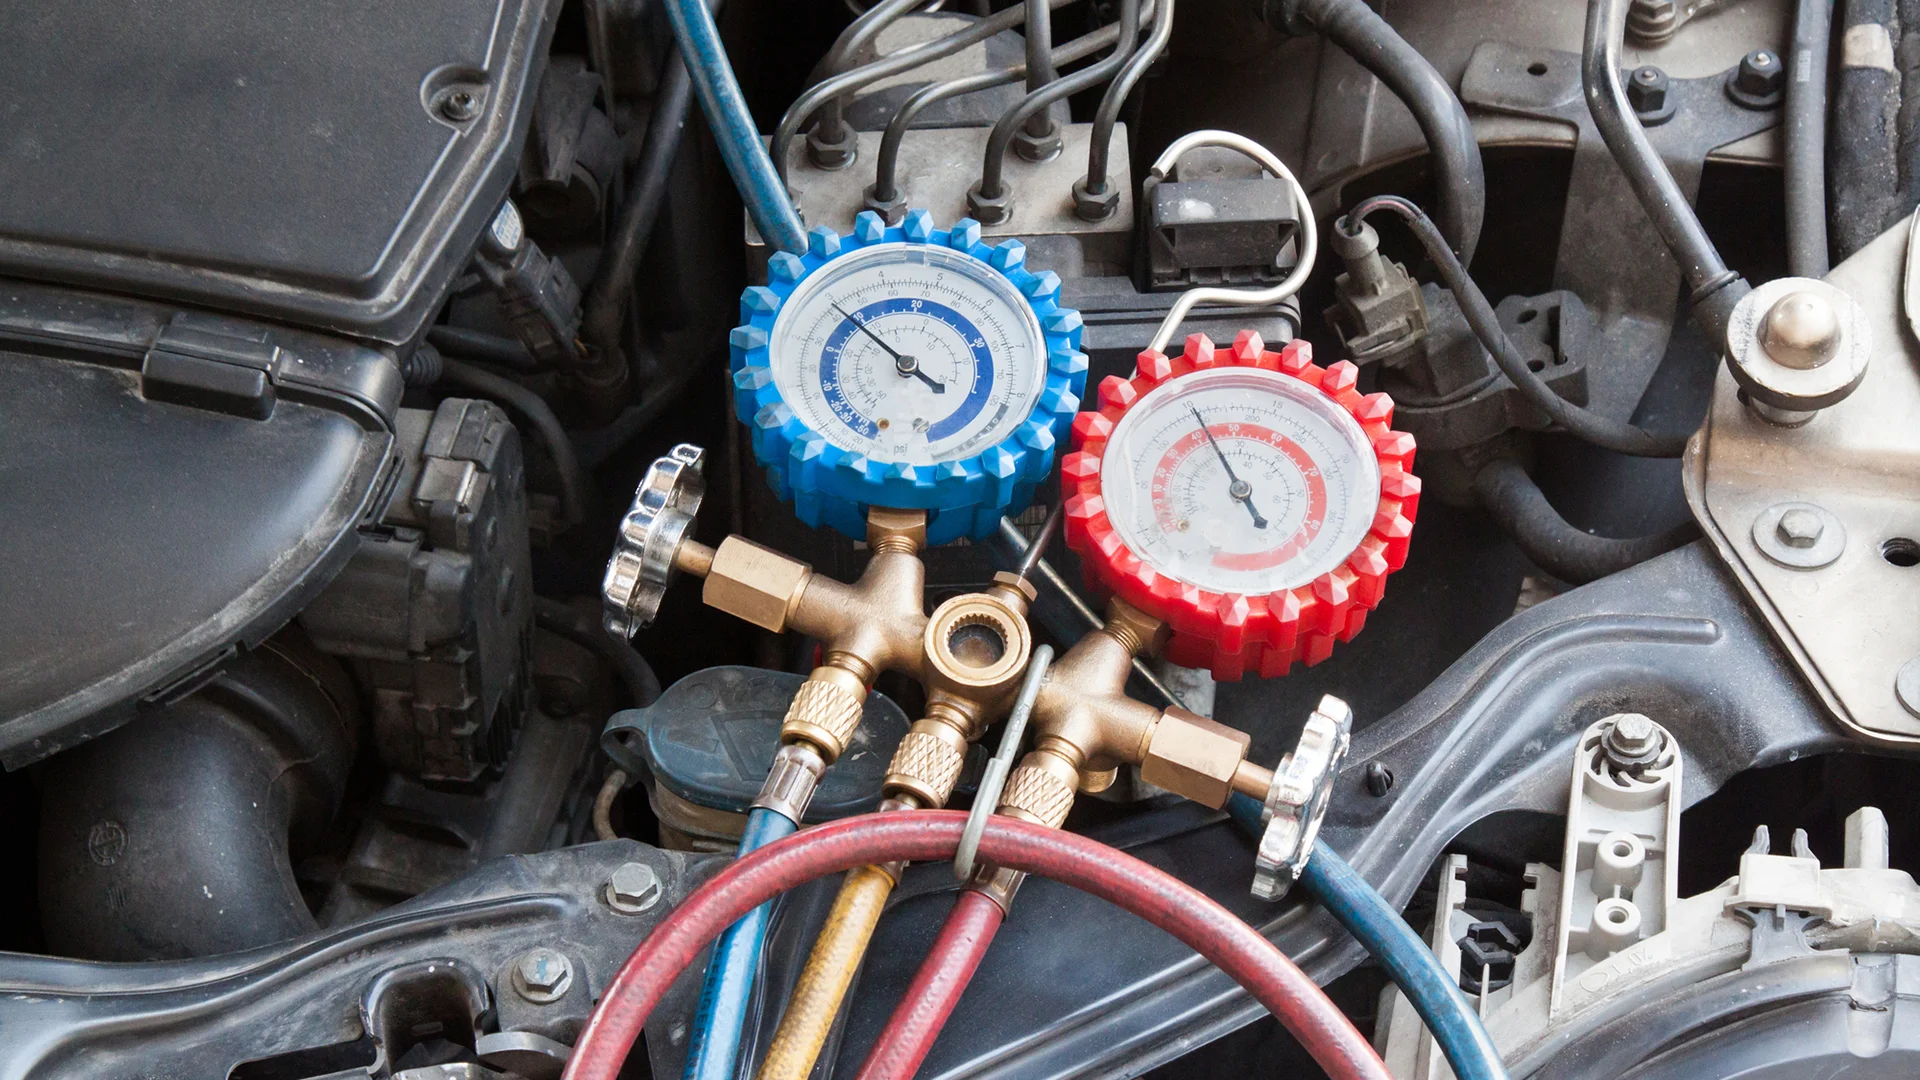
On some occasions, especially when the car has been stopped for a long period of time, it can happen that the air conditioning is faulty because at these stops, the car suffers and cannot be easily started again.
The air conditioning of the car works with a special gas, which must be changed from time to time, since if it is not changed often, it can happen that the air conditioning suffers more serious faults than something that can be fixed with a simple adjustment.
If you notice that the car is having trouble picking up heat, that it has bad odors when it releases air, that there is excessive fogging on the windows, or that there are other errors related to the air conditioning, it may be necessary to change the fluid in the air conditioning with one new, that is, recharge the air conditioning.
This means that we can maintain this closed circuit of air that is carried out thanks to this gas, since if we did not have this gas, we simply could not do it correctly and we would have some problems to do it properly.
Normally these recharges are carried out once a year, since according to various information and various studies, the car can lose up to 20% of this gas and to avoid greater evils, it is better to recharge this gas with that period, or before (because it would be wasting money) nor after.
What do you need to recharge the car air conditioning?
- An air conditioning charging machine with its corresponding accessories.
- Some wrenches.
Instructions to recharge car air conditioning
- Open the gas circuit: First of all, we must start with opening the gas passage circuit to begin carrying out the operation. We are going to take the gas circuit and unscrew the cap, which is located on the hood and we are going to distinguish two types of circuits, the high pressure circuit and the low pressure circuit. Regarding the high pressure circuit, we are going to see how the pipe is somewhat thinner and in the low pressure circuit how the pipe is a little wider than the other. Once we have located where the gas circuit is, we can move on to the next step, that is, connecting the hose.
- Connect the hose to the circuit and open the steps: Once we have located the gas circuit, both the high-pressure pipe and the low-pressure pipe, we are going to proceed to connect the hoses to carry out the operation for which we are here. We are going to connect the two hoses in the corresponding pipes, obviously connecting the high pressure pipe in the high pressure conduit (the fine one) and the low pressure pipe in the low pressure conduit (the fat one). Once they are connected to pressure of approximately 8 bars, we are going to proceed to open the two passages, first the low pressure one and then the high pressure one, to begin the process..
- Remove the old gas and check the pressure: The first thing we are going to do is do a self-cleaning, that is, to eliminate the old gas, since it is necessary to leave the ducts completely clean in order to be able to put the new gas without any kind of problem and safely. To do this, we are going to press the self-cleaning button (it is usually green) and wait approximately 20 minutes for the machine to carry out the complete operation. Once we have removed all the gas, we can start with the real operation, that is, with the gas charge. First of all we are going to check the pressure, if everything is correct, it is normal that we have a pressure of approximately -1. If this is not the case, it means that not all the gas has been removed and the process will have to be repeated.
- Carry out the gas charge and close valves. Now we are going to load the new gas, for which we are going to fill the machine with the gas. To do this, we are going to press the button corresponding to the charge of the new gas and we are going to wait a while for the machine to do its job. Finally we already have the gas inside our car and therefore, the air conditioning recharged and ready to work properly. Before finishing, do not forget to close the valves, to avoid all kinds of problems with the car. By closing the valves, we return to leaving everything as it was before starting this tutorial on how to recharge the air conditioning.
Tips to recharge car air conditioning
- Do it in the workshop: In the workshop the repair is not very expensive and it will cost you about 50 euros. It is not a very big price and you will save yourself problems.