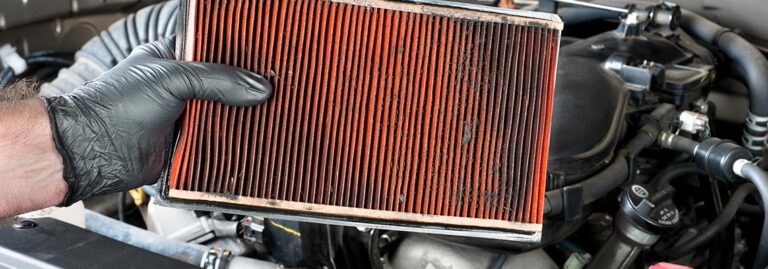
On this occasion we are going to explain how to know that our vehicle has dirty fuel injectors, and of course, how to clean them if necessary.

Fuel injector problems appear when it is dirty or clogged. The symptoms that can make it evident are varied, from problems starting the car, stumbling when moving forward, failures in the gas emissions tests, a decrease in the performance of the car and the inability to reach high engine revs.
There are two problems that can occur with the injectors:
- That it presents obstructions or air inlet, due to dirt and causes the aforementioned symptoms.
- Leaking fuel, which can cause a strong fuel smell inside the vehicle, as well as fuel economy issues.
Clogged or faulty injectors can cause serious engine damage. That is why they have to be cleaned at the first symptom, or replaced when they leak. All this as soon as possible. On the contrary, when they are simply clogged with dirt, they can be cleaned well, since they are quite strong and resistant elements of the mechanics of a vehicle, and rarely need to be replaced. For this reason, if you are thinking of buying new injectors, it would be a good idea to keep reading, because it is not difficult to clean them and you could save a little money in workshops and parts. Some of the above consequences, such as loss of engine oil levels, could cause irreparable damage that would ruin your engine forever. That is why it is very important to have the injectors cleaned or changed when the first symptoms are detected, or even to do it yourself.
What do you need to clean the injectors?
- Car
- Precise instrumentation
- Desire to work
Instructions for cleaning the injectors
- Buy an injector cleaner kit. They are available at any auto parts store, or cheaper online. Cleaning kits come with a bottle of cleaner, a gauge used to determine fuel pressure, and a hose that connects to the injector and fuel rail. Most fuel injector cleaning kits work for any type of vehicle, but reading the instruction manual to make sure you choose the right one is a very healthy habit. Cleaning fluid is sometimes sold separately for if you have ever purchased the kit before.
- Put on some protective glasses, suitable clothing and have a fire extinguisher handy for what can happen. Don’t panic, but remember that a cautious man is worth two.
- Check your vehicle manual for engine design. Take a look at your manual to determine where the fuel injectors are located, and also identify the location of the fuel pump, and its components, in order to proceed with its manipulation.
- Disconnect the fuel pump from the injectors. One option may be to connect the fuel return tube by inserting a U-shaped tube so that the fuel returns to the tank while you are cleaning the injectors. Some vehicles require the fuel pump fuse or relay to be removed. Follow the instructions in your vehicle manual if you are not sure how to disconnect the fuel pump, and connect the fuel return line by inserting another U-tube.
- Disconnect the vacuum line from the pressure regulator, and then connect the cleaning kit to the fuel pressure testing port, the other part joins the engine fuel line. However, the injector cleaner kit usually comes with detailed instructions on how to connect the hose and fitting to the fuel nozzle. Make sure that the injectors do not come into contact with the fuel, as the cleaner is flammable.
- Remove the fuel tank cap. The cleaner will remove debris and dirt from the injectors using the pressure pump to inject the cleaning solvent into the injectors. If we open the fuel cap we will be able to prevent excessive pressure from causing combustion.
- Start the vehicle and let the engine run for a while. Before you do this, you should have double checked that the fuel pump is already off. It usually takes 5-10 minutes for the cleaner to get through the injectors and settle. Always follow the instructions that come with the cleaning kit. The motor will shut itself off after the cleaner has done its job.
- Remove the cleaner and reconnect the fuel pump feed line and vacuum pressure regulator hose to their places.
- Also put the new fuel cap in place.
- Start the vehicle again to make sure the fuel injectors are working properly again. Listen for any abnormal noise and drive your vehicle a short distance to ensure that it runs smoothly. If you have followed the procedure correctly but you still notice abnormal noises, your vehicle may have another type of fault. In that case it is better to contact a professional auto mechanic. If you notice that the vehicle is still having poor fuel economy, the accelerator pedal does not respond correctly, there are bumps when moving forward, or you feel that something is wrong, take it to a mechanic, because you will most likely have to replace fuel injectors, or deal with a different problem.
Tips for cleaning the injectors
In the event that you decide to replace the injectors, follow these 4 steps:
- Make sure which procedure you are going to follow to relieve the pressure in the fuel system: Take a look at your car’s injection system, there are engines that have it easily accessible, and others that have taken advantage of every last hole to the millimeter. We must be cautious and plan very well how we are going to do it. An injector puller is necessary if the purpose is to remove the fuel injectors. There are other ways to remove them, but we could cause a breakdown that could be more expensive than buying the tool.
- Fuel Line Disconnect: Carefully remove the tube that distributes fuel to the injectors. If your engine has a fuel line that supplies the fuel injectors, you will have had to disconnect it before you could remove the injectors. It is easy. Here’s how: First, disconnect the main fuel line from the end of the rail. There may be an extra line at the other end, so you must disconnect this one as well. The fuel line is usually attached by means of screws or bolts, depending on the configuration of your car. Unscrew these items. If the wiring rides over the top of the track, disconnect it before proceeding to the next point. Once everything is disconnected from the rail, pull it carefully so as not to affect the injectors. Most fuel rails snap on to the tops of the injectors. Once you have removed the down clamping screws or bolts you should start the maneuver by pushing slightly.
- Disconnecting the fuel injectors: If your car uses a fuel rail to supply fuel to the injectors, it will already be in the previous step. If your car doesn’t come with it, just pull out each of the individual connectors. Each injector has a plug at the top that connects to the wiring harness. You can use a flat head screwdriver to gently pry these tubes loose. Put them in a safe place, they don’t get lost.
- Fuel Injector Removal: Do not try to yank it out. Remember, although they are strong, they are in a delicate area of the engine, and when they fall or are removed incorrectly, something else could be broken. Use the injector extractor key and don’t get complicated.