There is nothing more annoying than being about to go out and noticing that one of the tires is flat, or how dangerous it is to ride a motorcycle and a tire burst, so it is important to know at all times how to change motorcycle tires.
When we first learn to use a motorcycle, we focus more on how to drive a motorcycle than on other things of great relevance, some of those things are knowing how inflated the tires should be, so as not to damage the rim or the tire.
This is because many times we remove the tire abruptly and we do not realize if this affects the tire that can still serve us, or the rim of the motorcycle.
Changing the tires of a motorcycle is not entirely easy, especially if you do not have the necessary tools or if you do not know how to do it, so today we are going to show you step-by-step instructions to change the tires of a motorcycle without problems.
All you need is a few wrenches, tire levers, a pressure gauge, and of course, new tires and inflatables.
Read this article and learn with us the proper way to change motorcycle tires.
What do you need to change motorcycle tires?
- Silicone tire spray (also available as a paste riding soap)
- Lever bead breaker
- Manual bead breakers
- Pressure gauge
- 2 tires
- 2 inflatable tires
Instructions for changing motorcycle tires
- Have all the tools at hand, if you don’t have the tool nearby, it will take longer to change the tires of the motorcycle, because since you don’t have the things you need nearby, you will have to go for them, or you will not finish the job well due to lack of tools. We recommend going to an auto or motorcycle shop to get the tools, should you need them.
- To change the tires of a motorcycle, we must start by removing them one by one, we will start by removing the air from the rim by opening the air valve, this must be done with a tool that you can get at any auto parts store, the tool is called a purge valve, and you will use it to keep the air vent of the tire open.
- You just have to screw this part to the air outlet so that the tire is released. You have to do this carefully, as the strong air pressure can make it difficult to manipulate the tool, making it difficult to insert the purge valve. It is very important that the air comes out of the tire, because otherwise it will be very difficult to break the bead from the rim or you could break the tire during the attempt, so deflating the tire will always be the first step to change the tires of a motorcycle.
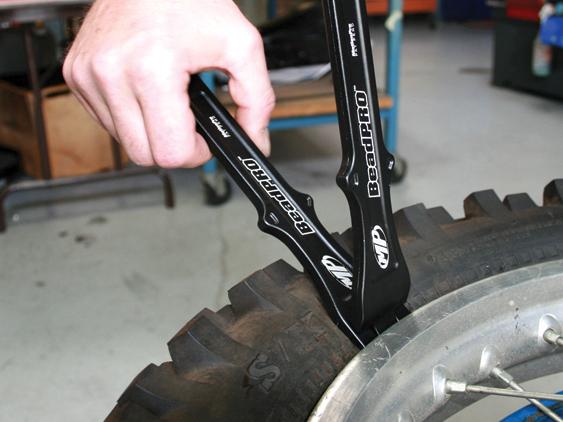
- It is time to start removing the tire from the rim. Take the bead breaker and place the tire on it, with the bead breaker press so that the tire is dismounted, help yourself with some bead breakers manuals to move the tire and remove the tire off the rim. It is recommended that you break the tire on both sides or on four sides, that is, following the pattern of a cross, so it will be easier to remove the tire rim from the rim. Now that you’ve worked your way between the tire, rim, and rim, pry the tire off hard and careful not to break it, it may still work. With the manual bead breakers, the tire begins to take off from the rim, since the rim is no longer inside the tire it will be easier to take off the tires.
- Repeat this same process with the other motorcycle tire, remember that to remove the motorcycle rim, you only have to support the motorcycle with a hydraulic jack while you remove the rim with the tire.
- Now it is time to change the tires of the motorcycle, for this we will start by taking one of the new tires and we will begin to apply silicone to mount with a good size brush, you can get it at any motorcycle or car store, it is easy to get and easy to apply. You must soak the brush in the silicone and apply it to the entire internal contour of the tire, if necessary, apply two or more layers, the important thing is that it is not missing.
- Start mounting the tire on the rim, use the manual bead breakers to break it in, this can take a bit of time. Do not mount the entire tire on the rim, remember that you must insert the rim inside the tyre, just integrate the tire a little so that it is easier for you to put the new rim later. Also remember that the tire must be mounted on the rim following the direction of travel.
- Adjust the tire so that it coincides with the part of the rim where the valve should come out. Close the papillon and start inflating the tire with the compressor, pump or air gun you have. The tire must be inflated on both sides, not just one, then you must mount it on the bike and tighten it well with the wrenches and screwdrivers. Subsequently you must tighten the papillon and the valve to fit them well to the rim and to the motorcycle safely. If you do not tighten them well, it is possible that there are air leaks and when driving, this can put your safety and the integrity of the motorcycle at risk.
- Last step we must take the air pressure gauge, and measure the tire pressure, if it is very low, we must inflate the tire even more to get it to heel on both sides. Ready you have managed to change the tires of a motorcycle.
Tips for changing motorcycle tires
- It is preferable that you use the lever and hand tire removers to remove the tires from the rim, it is always easier if more than one tool is used.